
So, you've decided to build an outdoor pizza oven. It's one of the most rewarding backyard projects you can tackle, creating a focal point that will change how you entertain forever. The journey really boils down to two main paths: building a classic masonry oven from scratch or installing a modern, high-performance prefabricated unit. Both routes end with incredible pizza, but getting there requires some serious thought about location, foundations, and how you want the finished oven to look and feel.
Planning Your Perfect Outdoor Pizza Oven
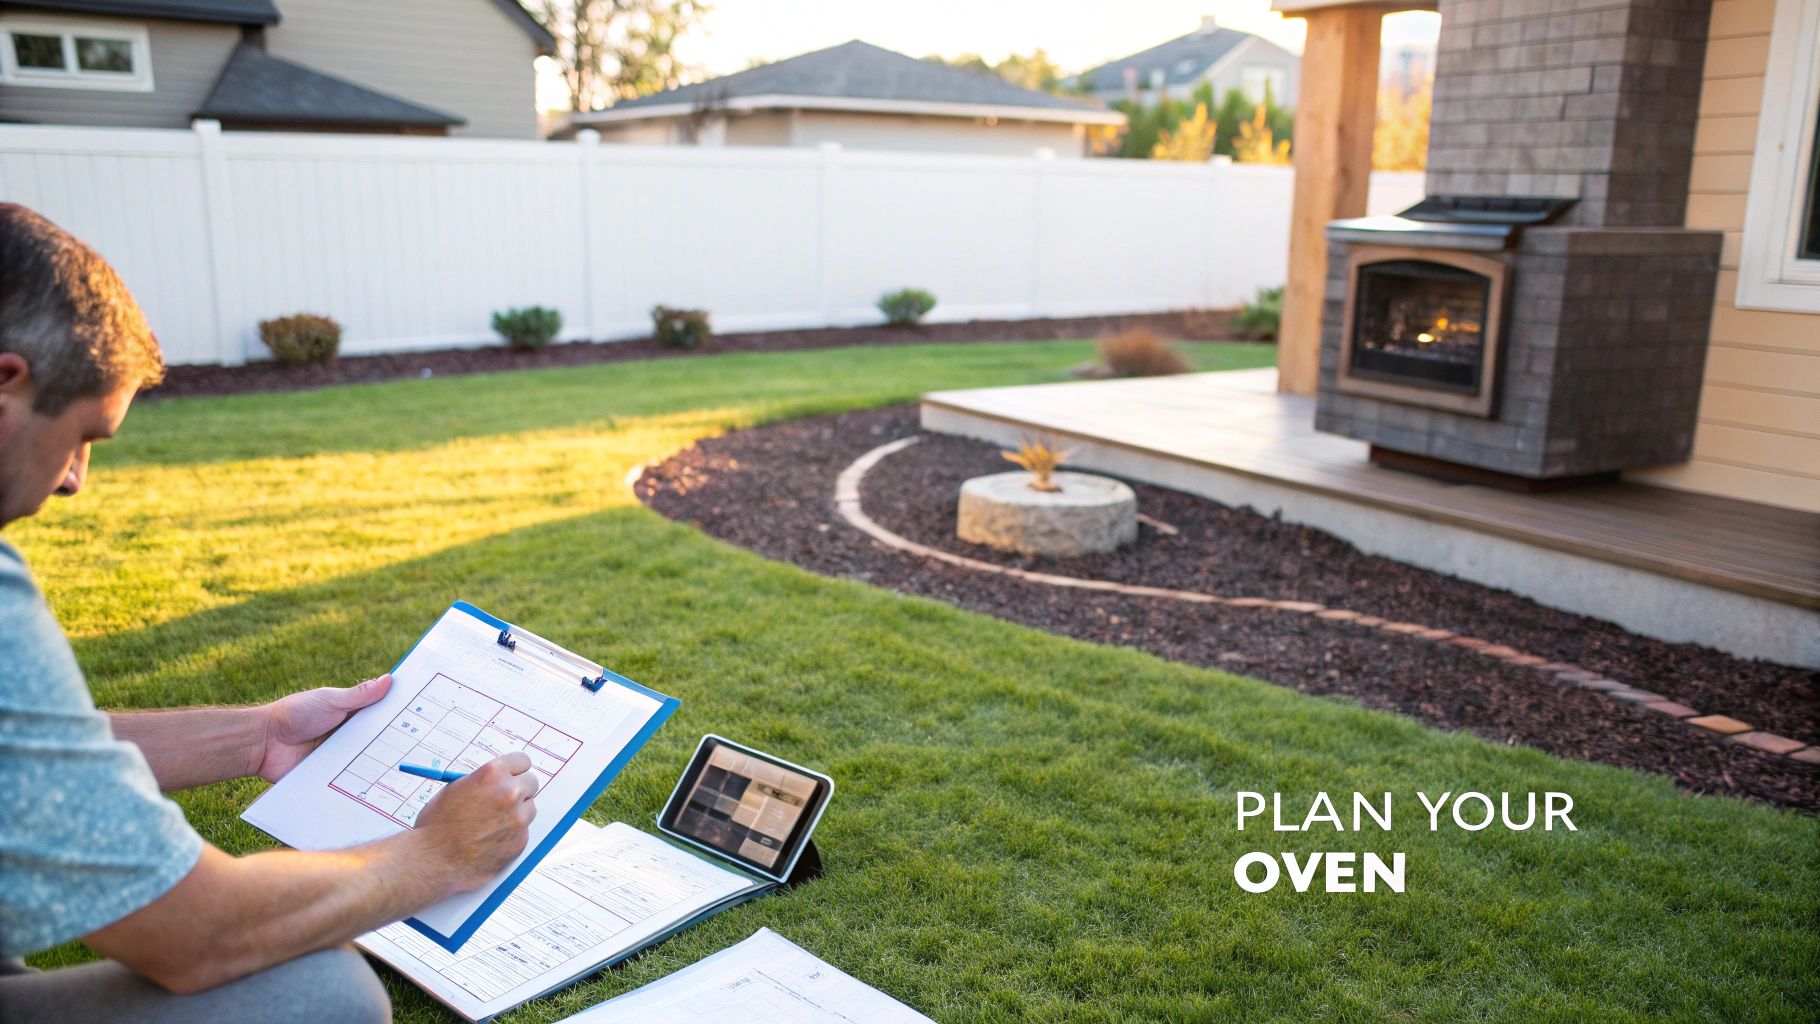
Before you even think about mixing concrete or laying a single brick, the real work begins with a solid plan. This is where you map out your vision and make the big decisions that will shape the entire project. An outdoor oven isn't just a cooking appliance; it becomes the heart of your backyard, a place where friends and family will gather for years to come.
This isn't just a niche hobby anymore. It’s part of a huge shift towards creating incredible outdoor living experiences. The global pizza oven market was already valued at around USD 2.50 billion in 2024 and is expected to climb to USD 4.20 billion by 2032. That explosion in popularity shows just how much people are investing in quality, functional additions to their outdoor spaces. You can read more about this trend over on fortunebusinessinsights.com.
Masonry vs. Prefabricated: Which Path Is Right for You?
Your first major fork in the road is deciding between a traditional masonry build and a modern prefabricated kit.
A custom masonry oven is a true labor of love. It gives you complete creative freedom to match the brick, stone, or stucco to your home’s aesthetic, creating a truly seamless architectural feature. But make no mistake—this path requires a lot of time, a fair bit of skill, and a good understanding of how refractory materials work under intense heat.
Prefabricated ovens, on the other hand, are the fast track to wood-fired cooking. These kits come with a professionally engineered dome and hearth, which takes all the guesswork out of achieving perfect heat retention and airflow. Installation is much quicker, and you're pretty much guaranteed excellent, consistent performance. You still get to customize the exterior finish, but the oven's core shape and size are predetermined.
To help you weigh the options, here's a quick breakdown of what each approach entails.
Prefab vs Masonry Pizza Ovens: A Quick Comparison
| Consideration | Prefabricated Oven | Custom Masonry Oven |
|---|---|---|
| Skill Level | Beginner to Intermediate | Intermediate to Advanced |
| Build Time | A few days to a week | Several weeks to months |
| Customization | Limited to exterior finish | Fully customizable design |
| Performance | Consistently high (engineered) | Varies based on skill/design |
| Cost | Often more predictable upfront | Can vary widely with materials |
| Satisfaction | Quick results, less stress | Deep satisfaction of building |
Ultimately, the right choice comes down to what you value most. Do you want the pride and total creative control of a traditional build, or do you prefer the speed, convenience, and engineered perfection of a modern kit? There's no wrong answer.
Key Takeaway: Your choice between masonry and prefab hinges on your priorities. Do you value complete creative control and the satisfaction of a traditional build, or do you prefer the speed, convenience, and engineered performance of a modern kit?
Defining Your Oven's Location and Purpose
Where you put the oven is just as critical as how you build it. The perfect spot is a blend of convenience, safety, and social dynamics. As you scout your yard, think through these key points:
- Proximity to the Kitchen: How far will you be hauling ingredients, dough, and tools? The closer it is to your main prep area (whether indoors or out), the more you'll enjoy using it.
- Wind and Smoke Direction: Take note of the prevailing winds in your yard. You want to position the oven so that smoke drifts away from your house, your patio, and your guests.
- Social Hub Potential: Picture your parties. The oven should be a natural focal point where people can watch the action without creating a traffic jam.
- Safety Clearances: This is non-negotiable. Ensure there's plenty of space between the oven and anything combustible—your house siding, fences, sheds, and especially low-hanging trees.
An outdoor pizza oven rarely exists in a vacuum. It’s often the star player in a much larger backyard vision. If you’re planning a full outdoor renovation, it’s a great idea to look at comprehensive DIY outdoor kitchen plans to see how everything can work together. A little foresight now will ensure your new oven feels like a seamless, integrated part of your dream outdoor retreat.
Building a Rock-Solid Foundation
Every great build, whether it's a home or a pizza oven, starts with a flawless foundation. When you're putting in an outdoor oven, this isn't just a friendly tip—it's the single most critical step to make sure your creation lasts for decades. If you cut corners here, you’re setting yourself up for cracks, instability, and a project that fails before you even get to bake your first pizza.
The foundation does more than just hold the oven up. It’s what isolates your heavy masonry structure from the whims of mother nature, like ground movement, frost heave, and moisture. A serious masonry oven can easily top 4,000 pounds, and all that weight needs an unshakeable base to rest on. This is the bedrock of your entire build, so let's get it right.
Choosing the Perfect Site
Before you even think about picking up a shovel, you need to decide on the perfect location. This is a delicate balance between safety, convenience, and how you want your outdoor living space to feel. The goal is to make the oven feel like an intentional, integrated part of your backyard, not an afterthought.
As you scout your property, keep these practical points in mind:
- Safety Above All: You absolutely need a minimum clearance of 10 feet from anything combustible. That means your home's siding, wood fences, sheds, and especially any overhanging trees or branches that could pose a fire risk.
- Mind the Wind: Get a feel for the prevailing winds in your yard. You want to position the oven's opening so that smoke blows away from your guests and seating areas, not directly into them.
- Check for Utilities: This one is non-negotiable. Before you dig, call 811 (in the U.S.) to have your local utility companies mark any underground gas, water, or electrical lines. Hitting one of those is a dangerous and incredibly expensive mistake.
A well-placed oven becomes the heart of your outdoor entertaining space. Think about the path from your kitchen to the oven—you'll want it to be as short and direct as possible to make prep and cooking feel effortless.
It's no surprise that homeowners are investing more in creating these kinds of high-performance outdoor spaces. The pizza oven market is projected to skyrocket, reaching an estimated USD 3.54 billion by 2035. This boom is all about creating functional, beautiful outdoor kitchens, and it all starts with that solid foundation. You can read more about the market trends on Research Nester.
Constructing the Concrete Slab
With your spot picked out, it's time to build the actual foundation—a reinforced concrete slab. This isn't just a glorified patio paver; it's an engineered structure designed to handle a massive load and withstand the elements for years to come.
Your finished slab needs to be larger than the oven’s footprint, giving you a stable border of at least 6 inches on all sides. For most backyard ovens, a thickness of 4 to 6 inches is perfect. The real secret to its longevity, though, is the steel reinforcement inside.
Building the Formwork
The first real construction task is to build a simple wooden frame, called formwork, that will act as a mold for the wet concrete.
- Measure and Cut: Grab some 2x6 or 2x8 lumber and cut pieces to create a frame with the right internal dimensions for your slab.
- Assemble and Level: Screw the corners together firmly. Once you place the frame in your excavated area, this next part is crucial: use a level to ensure the top edges are perfectly flat and even all the way around. A level slab now means a level cooking surface later.
- Stake for Support: Drive wooden stakes into the ground along the outside of the frame, then screw them into the lumber. This keeps the form from bowing outward under the immense pressure of the wet concrete.
Adding Reinforcement for Strength
Concrete has incredible compressive strength (it’s hard to crush), but it’s weak under tension (it can crack when pulled or bent). That's where steel rebar comes in. It gives the slab the tensile strength it needs to resist cracking over time.
Inside the form, lay out a grid of #3 or #4 rebar (that’s 3/8-inch or 1/2-inch diameter). Space the bars about 12 inches apart in both directions, creating a checkerboard pattern. Use wire ties to secure the intersections where the bars cross.
Here's a pro tip: the rebar grid can't just lie on the dirt. It needs to be embedded in the middle of the concrete. Use small plastic or concrete supports called "chairs" to lift the rebar grid a few inches off the ground.
Pouring and Curing the Concrete
With the form built and the rebar in place, you're ready for the pour. For a typical foundation, you’ll probably need around 15-20 bags of 80-pound concrete mix. Follow the instructions on the bag, mixing it to a consistent, oatmeal-like texture.
Shovel or pour the concrete into the form, making sure to spread it into all the corners. Overfill it just a bit. Then, take a straight 2x4 and, resting it on the edges of your formwork, drag it across the surface in a back-and-forth sawing motion. This is called screeding, and it levels the concrete perfectly. A final pass with a trowel will give you a nice, smooth surface.
Now for the hardest part: waiting. The concrete needs to cure for at least 7 to 10 days before you can start building on it. To ensure it reaches maximum strength, you should help it cure slowly. For the first few days, lightly mist the surface with water and cover it with plastic sheeting. This patient curing process is your final insurance policy for a foundation that will never let you down.
Constructing the Oven Core From Hearth to Dome
With a solid foundation cured and ready, we’re at the best part: building the oven itself. This is where your project really starts to take shape, transforming from a simple slab into a high-performance cooking machine. Whether you’re painstakingly laying firebricks one by one or setting a modern prefab unit into place, this is the heart of the whole build.
The construction of the oven core—from the flat cooking floor to the curved dome—is a game of precision. This stage is what determines your oven's ability to absorb, retain, and radiate the intense heat needed for perfect pizza. A well-built core will easily hit temperatures over 900°F and hold that heat for hours, letting you cook pizza after pizza with that classic leopard-spotted crust.
The process of building your foundation is a critical first step. This visualization outlines the key stages from prepping the site to pouring the concrete that supports your oven core.
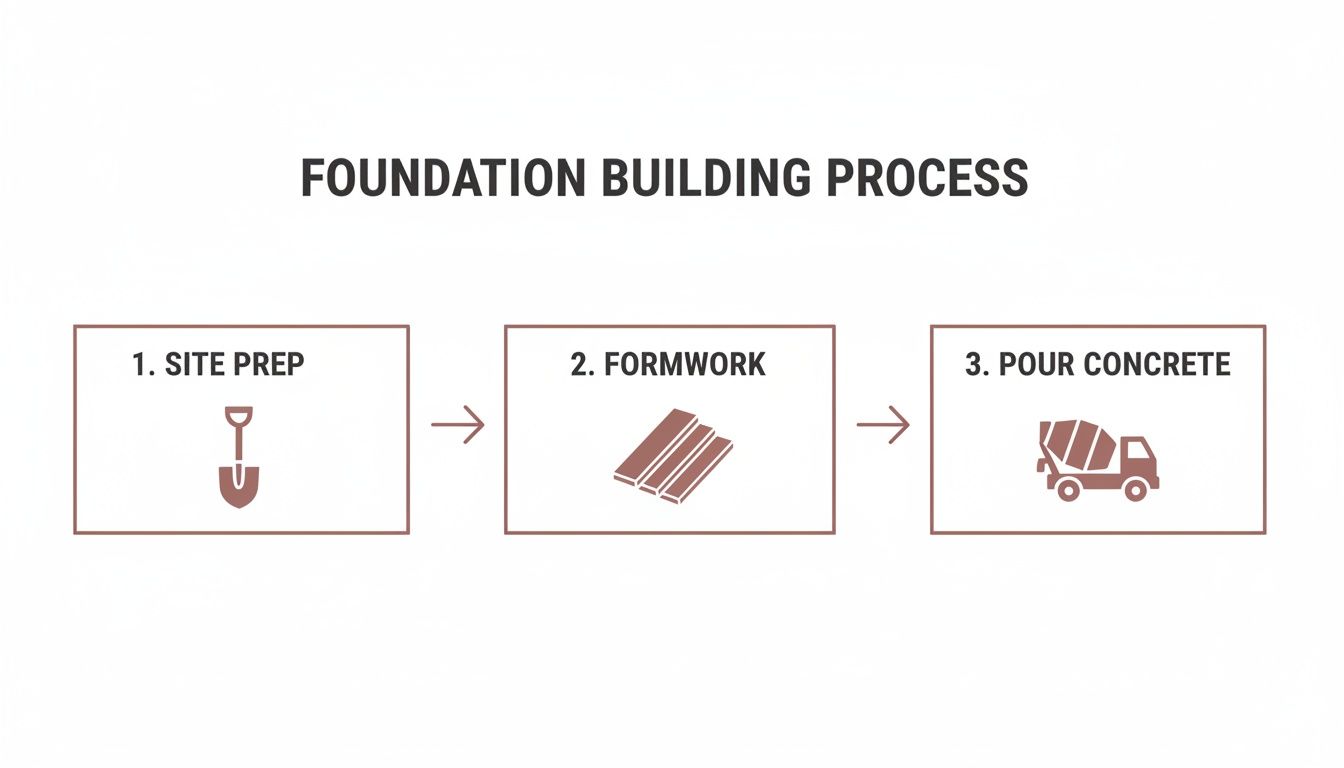
This simple flow—site prep, formwork, and the concrete pour—is the bedrock of a stable, long-lasting oven. Get this right, and your oven core will have an unshakeable base for years to come.
Laying the Perfect Firebrick Hearth
The hearth is the cooking floor, and it has to be perfectly flat, stable, and able to handle wild temperature swings. This is no place for standard red bricks. You absolutely must use firebricks, which are specifically engineered to withstand the intense heat cycles of a wood-fired oven without cracking.
I always recommend starting with a soldier course of firebricks around the perimeter of the oven floor. From there, you can start filling in the interior. My go-to is a classic herringbone pattern.
- Why a Herringbone Pattern? It's not just for looks. This interlocking layout prevents your pizza peel from snagging on a straight grout line, which makes for a much smoother launch and retrieval. It also adds a ton of structural integrity to the cooking floor.
- Dry-Fit First: Always, always lay out your bricks without any mortar first. This is your chance to make any necessary cuts and adjustments to get that tight, perfect fit before you commit with mortar.
- Use Refractory Mortar: When you're ready to set the bricks for good, you'll need a high-temperature refractory mortar. Unlike the standard stuff, it's formulated to expand and contract with the bricks, which is key to preventing cracks down the road. Just apply a thin, consistent layer.
Your goal here is a surface that is dead level. Use a rubber mallet to gently tap each brick into place, checking constantly with a level as you go. A flat hearth is completely non-negotiable for even cooking.
Shaping the Masonry Dome
If you're going the traditional masonry route, shaping the dome is easily the most artful—and challenging—part of the build. The geometry of that dome is what creates the perfect convection currents that cook the pizza from all sides at once. A well-proportioned dome heats up efficiently and holds its temperature for a remarkably long time.
To get the shape just right, most builders use some kind of form. A really effective and simple way to do this is to build a dome shape out of damp sand packed tightly on the hearth. Once your sand form is built, cover it with a layer of wet newspaper. This little trick keeps the mortar from sticking to the sand.
Now you can start laying your firebricks over the sand form, beginning at the base and working your way up in concentric circles. Each new layer will lean inward just a bit more than the last, creating that iconic dome. Be generous with the refractory mortar and be prepared to cut wedge-shaped bricks (known as voussoirs) to keep your joints tight.
Installing a Prefabricated Oven Core
If you opted for a prefabricated oven, this stage is much more straightforward, but it still demands careful attention. These units come with an engineered dome and hearth, which takes all the guesswork out of thermal performance. Your main job is to get it placed correctly and securely on your foundation.
Make sure you follow the manufacturer’s instructions to the letter. Most prefab domes are incredibly heavy and will require a few friends or some lifting equipment to move safely. Once it’s in position, double-check that it’s perfectly level and centered on your base before you move on to the next step.
The Secret to a Great Oven Is Insulation
Whether you’ve just built a masonry dome from scratch or installed a prefab unit, what you do next is what separates a good oven from a truly great one: insulation. Without it, all that beautiful heat you generate will just radiate out and escape, forcing you to constantly feed the fire and deal with inconsistent temperatures.
Effective insulation really comes down to two key layers:
- Ceramic Fiber Blanket: This is your main heat shield. You’ll want to wrap the entire dome in at least two or three layers of a high-density ceramic fiber blanket. A 3-inch thick layer is a solid target. This stuff is lightweight but has incredible thermal properties, keeping that scorching heat locked inside the oven. For extra protection, you can look into products like a Blaze insulated jacket specifically designed for this.
- Insulating Concrete: Over that ceramic blanket, you'll apply a structural shell. This is usually made from a lightweight insulating concrete—a mix of vermiculite or perlite with Portland cement works great. This layer adds some thermal mass and gives you a solid, durable exterior that you can finish later with stucco, stone, or brick.
This commitment to performance is exactly why so many homeowners are installing these ovens. It’s no surprise that recent market analysis shows residential buyers made up a staggering 60.65% of the pizza oven market in 2025. People want premium, high-performance setups that deliver professional results, and taking the time to insulate properly is how you get there.
Adding the Finishing Touches
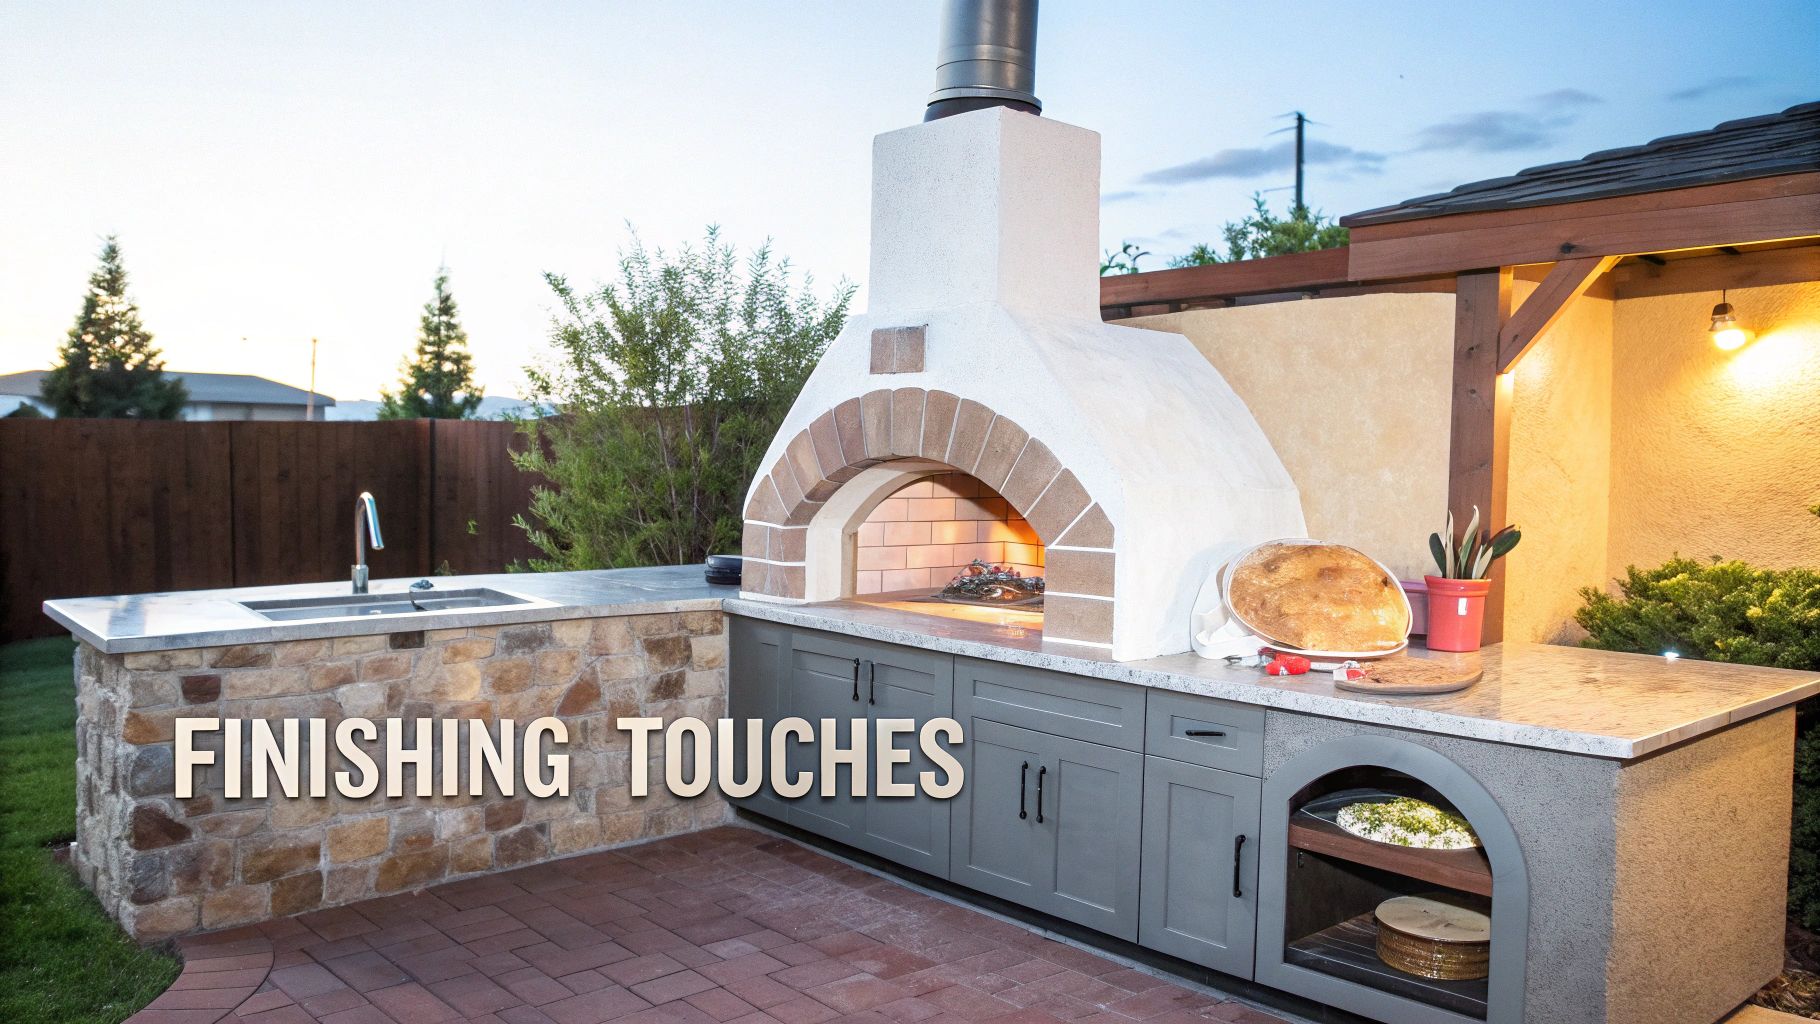
With the insulated core of your oven complete, you can breathe a sigh of relief—the heavy lifting and technical work are behind you. Now comes the fun part. The focus shifts to aesthetics and day-to-day functionality, turning your project from a well-built cooker into the true centerpiece of your backyard.
This is where you give the oven its personality. The exterior shell is your canvas, and it serves two purposes: protecting the critical insulation layers from the weather and tying the oven's look into your home's design, patio, or broader outdoor kitchen.
Choosing Your Exterior Finish
The right finish is more than just window dressing. It needs to be tough enough to handle everything Mother Nature throws at it while also being flexible enough to manage the subtle expansion and contraction that happens with every heat cycle.
You've got a few fantastic options here:
- Stucco: This is a classic for a reason. It delivers that clean, Mediterranean vibe and can be tinted to match any color palette you have in mind. Whether you want it smooth or textured, stucco is a cost-effective and versatile choice that molds beautifully over a curved dome.
- Stone Veneer: If you're going for a more rustic, substantial feel, you can't beat stone. Whether you use natural stone or a high-quality manufactured veneer, it creates a powerful architectural statement and is incredibly durable. Just be prepared for a challenge—applying it to a dome takes patience and skill, as each piece has to be cut and fitted just right.
- Brick: For a traditional, timeless look, finishing your oven with brick is a superb choice. It's the perfect way to create a cohesive design, especially if you can match the brick to your house or existing patio work. It's definitely labor-intensive, but the classic result is worth every bit of the effort.
A critical pro tip: no matter which material you choose, use a flexible, polymer-modified mortar. Standard mortar is too rigid and will inevitably crack under thermal stress. Using the right adhesive is the secret to making sure your beautiful finish lasts for years.
Crafting the Oven Opening and Door
The entrance to the oven, often called the arch, is a natural focal point. This is your chance to add a signature touch. Building a decorative arch with complementary brick or stone not only looks fantastic but also elegantly frames the oven opening.
An oven door is another must-have component for unlocking your oven's full potential. While you won't use it for Neapolitan-style pizza, an insulated door is absolutely essential for baking bread, roasting meats, or simply retaining heat for hours after the fire has died down. Look for a heavy-duty, insulated steel door that creates a snug seal. It's what transforms your pizza oven into a true multi-purpose outdoor cooker.
Building a Functional Landing Area
One of the most common mistakes I see is forgetting about the workspace. You absolutely need a practical landing area, or hearth extension, right in front of the oven. This is where you’ll stage a pizza before sliding it in or set down a searing-hot cast iron pan when it comes out.
This landing needs to be made from a durable, heat-proof material like granite, concrete, or stone. I recommend making it at least 12-16 inches deep to give yourself enough room to work safely and efficiently. A well-designed landing also gives you a convenient spot to keep essential tools, like your favorite pizza peel, right where you need them. Having the right gear makes all the difference, and you can explore different pizza peel options to find one that fits your workflow.
Thinking through these details is how you begin to bridge the gap between a standalone oven and a fully integrated outdoor kitchen. You’re not just finishing a project—you’re designing an experience.
Curing Your New Oven and Lighting the First Fire
I know the temptation. You’ve just finished this incredible build, and all you want to do is crank it up to 900°F and throw in a pizza. Hold on. This last step is the ultimate test of your patience, and rushing it is the single biggest mistake you can make.
Lighting a huge fire right out of the gate will cause thermal shock, creating cracks that will permanently plague your oven. The key is a slow, methodical curing process—a series of small, controlled fires that get progressively hotter over several days. You’re not trying to force the moisture out of the masonry; you’re gently coaxing it out. Get this right, and your oven will handle blistering heat for decades.
A Reliable Day-by-Day Curing Schedule
While every oven has its own quirks, a five-day schedule is a proven, safe bet. The one tool you absolutely need is an infrared thermometer. Don't even think about guessing the temperature.
- Day 1: The First Warm-Up. Start a tiny fire with just some kindling. You're aiming to keep the internal dome temperature around 200°F for 4-6 hours. You should see steam weeping from the oven mouth or chimney—that’s a fantastic sign that the process is working.
- Day 2: A Little More Heat. Build a slightly bigger fire today. Your goal is a sustained 300-350°F for another 4-6 hours. As the heat pushes deeper into the masonry, you'll likely still see some moisture escaping.
- Day 3: The Mid-Range Burn. Now we're talking. Build a more substantial fire to hit 450-500°F. You'll want to keep this going for at least 4 hours to chase out that last bit of stubborn water.
- Day 4: Getting Close to Pizza Temps. Your oven is much stronger now. Build a fire that gets the dome up to 600-650°F and hold it there for 2-3 hours.
- Day 5: Full Power. This is it. Build your first real pizza fire and let the oven climb to 750°F or even higher. After holding that temp for about an hour, your oven is officially cured and ready for action.
Crucial Tip: Between each firing, you have to let the oven cool down completely on its own. Never, ever use water to put out the fire. Think of this slow, deliberate process as your insurance policy for a long-lasting, crack-free oven.
From Builder to Pizzaiolo: Lighting the Perfect Fire
With the curing done, it’s time to shift your mindset from builder to cook. Building the right fire is an art form.
Start your fire in the center of the hearth with small, dry hardwoods—oak and maple are perfect. As it catches and grows, gently push the burning logs to the back or side. You want the flames to actually roll up the side and across the dome. This is what heats the thermal mass you so carefully built.
You’ll know the oven is ready when the black soot on the dome burns away, revealing the clean, white refractory material underneath. We call this “clearing the dome.” It’s the sign that the dome has absorbed a massive amount of heat and is now radiating it back down onto the hearth. That intense, top-down heat is the magic that cooks a Neapolitan-style pizza in 60-90 seconds.
Getting that perfect heat saturation is also about having a great cooking surface, so it's worth investing in a quality professional pizza stone that won't crack under pressure.
Congratulations—you're officially ready for pizza night.
Answering Your Top Questions About Building a Pizza Oven
Even with the best plans in hand, you’re bound to have questions pop up when you're building an outdoor pizza oven. It's just part of the process. I've pulled together some of the most common things people ask, hoping to give you clear, straightforward answers that will help you feel confident as you build.
Think of this as a way to get ahead of those little issues that can slow you down.
How Long Does It Take to Build a Pizza Oven?
This is probably the biggest question, and the answer really boils down to one thing: are you building from scratch or using a prefab kit?
A full-on masonry build is a serious commitment. You're looking at anywhere from several weeks to a couple of months, especially if you're new to this kind of work or have a complex design in mind. A huge chunk of that time is just waiting for the concrete foundation and the oven itself to cure properly.
On the other hand, a prefabricated oven gets you cooking much, much faster. Most people can get the main oven assembled in a weekend. Then you'll need another few days to apply whatever exterior finish you've chosen. If you want great pizza without a long construction project, this is definitely the way to go.
What Is the Best Material for an Outdoor Pizza Oven?
When it comes to the heart of the oven, there’s no room for compromise—you absolutely have to use refractory materials. These are engineered to handle intense, prolonged heat without falling apart.
Here are the non-negotiables:
- Firebricks: These dense bricks form the cooking floor (the hearth) and the dome. Their job is to soak up heat and radiate it back evenly.
- Refractory Mortar: This isn't your average mortar. It's designed to expand and contract with the heat, so your oven doesn't crack itself apart.
- Ceramic Fiber Blanket: This is your primary insulation. You'll wrap it tightly around the dome to trap heat inside, keeping the oven blazing hot for hours on end.
Once the core is built, you can get creative with the exterior. Stucco, stone veneer, and brick are all popular choices that let you match the oven to your patio or outdoor kitchen while protecting the crucial insulation layers from rain and sun.
Take it from me: using the right materials from day one is everything. Standard bricks or regular concrete will fail spectacularly under the thermal shock of a wood fire. Investing in proper refractory supplies isn't just a good idea—it's essential for safety and ensuring your oven lasts a lifetime.
Can I Use My Pizza Oven for More Than Just Pizza?
Absolutely! It’s a huge misconception that these are just one-trick ponies. A well-built, well-insulated outdoor oven is one of the most versatile cooking tools you can own.
Once you’ve fired it up for pizza, all that retained heat sticks around for hours. As the temperature slowly drops from its peak, you hit perfect conditions for all sorts of other dishes:
- Baking incredible, rustic loaves of bread.
- Roasting chickens, vegetables, or big cuts of meat to perfection.
- Searing fish in a screaming-hot cast-iron skillet.
- Braising stews or slow-cooking a pot of beans overnight.
For more inspiration, check out our guide on the best outdoor pizza ovens and how to push them beyond pizza. The secret to unlocking all this potential is a good, insulated door, which helps you trap the heat and maintain lower, steadier temperatures for baking and roasting.
At UrbanManCaves.com, we live and breathe this stuff. We have the high-quality components and expert advice you need to build the outdoor living space you've been dreaming of. Explore our collection of outdoor kitchens, premium grills, and fire features to complete your backyard vision.