
Building a beautiful and functional outdoor kitchen doesn't have to drain your savings. The real secret to incredible outdoor kitchen ideas on a budget comes down to three things: smart planning, clever material choices, and strategic investments. Let's get one thing straight—'budget' doesn't mean you have to settle for less style.
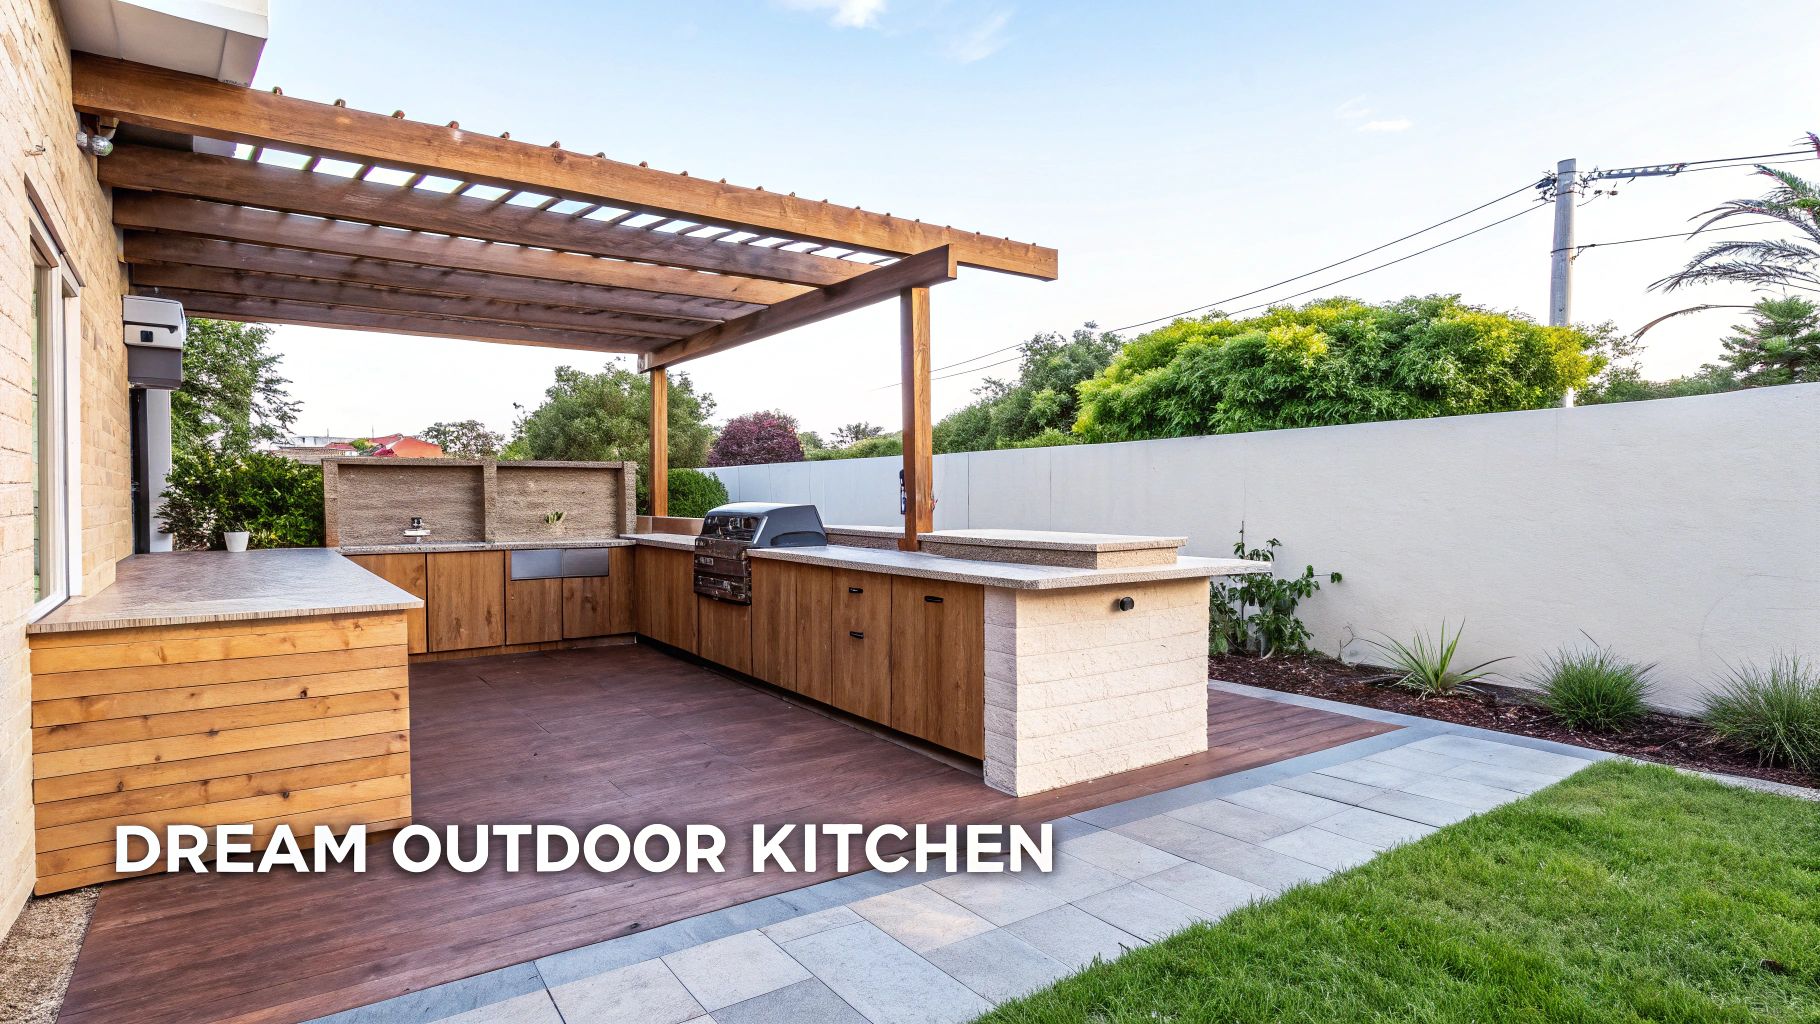
Your Dream Outdoor Kitchen Is Closer Than You Think
When you picture a high-end outdoor kitchen, it's easy to see dollar signs. But that's a myth we're about to bust. With some thoughtful design, you can create a seriously chic and inviting space for entertaining that actually adds value to your home. It's less about hunting for the cheapest of everything and more about making smart, informed choices that give you that premium look for a fraction of the cost.
Think of this guide as your complete roadmap. We're going to walk through real, actionable strategies that make a high-end outdoor kitchen a reality, proving that a sophisticated space is more accessible than you think. This isn't just a trend; it's a movement. The global outdoor kitchen market was valued at a massive USD 21.81 billion in 2023 and is on track to hit USD 45.45 billion by 2032. All that growth means more competition and, for you, more innovative and affordable options than ever before. You can explore more market trends and see the full report here.
Here's a quick look at the fundamental pillars for building a stylish and affordable outdoor kitchen, which we'll explore in detail.
Core Strategies for a Budget-Friendly Outdoor Kitchen
| Strategy Pillar | Key Focus | Potential Savings |
|---|---|---|
| Strategic Planning | Prioritizing must-have features and designing a simple, efficient layout. | 20-30% |
| Smart Material Selection | Using cost-effective materials that mimic high-end finishes without the price tag. | 15-25% |
| Prioritized Appliances | Investing in a great grill while opting for budget-friendly alternatives elsewhere. | 10-20% |
| Phased Construction | Building your kitchen in stages, starting with essentials and adding luxuries later. | Spreads cost over time |
These four pillars form the foundation of every successful budget-friendly project, helping you make the most of every dollar.
Core Principles for a Budget-Friendly Build
Before you start picking out countertops, it helps to get your head around the basic principles of a cost-effective project. It’s like building a house—you pour the foundation long before you start hanging pictures. A solid plan here will save you from expensive headaches later.
Throughout this guide, we'll keep coming back to a few key areas:
- Strategic Planning: This is all about setting a realistic budget and designing a layout that gives you the most bang for your buck.
- Smart Material Selection: Think polished concrete or stone veneer—materials that deliver a high-end look without the high-end price.
- Prioritized Appliance Investment: Knowing where to splurge (like on a killer grill that will last for years) and where you can get creative and save.
- Phased Construction: Don't have the cash for everything at once? No problem. Build your kitchen in stages, starting with the core components now and adding the extras when you're ready.
The most successful budget-friendly outdoor kitchens don't happen by accident. They are the result of careful planning and prioritizing function and longevity over unnecessary frills. This approach ensures you create a space that is both beautiful and built to last.
By getting a handle on these concepts, you can shift your whole perspective from "What can I afford?" to "How can I smartly create the kitchen I really want?" It puts you back in the driver's seat. For some visual inspiration, check out our other outdoor kitchen ideas and design guides.
Alright, let's dive in and start building the outdoor space you've always wanted.
Creating Your Blueprint For an Affordable Build
Every truly great outdoor kitchen starts the same way: as a simple sketch on a piece of paper. Long before the first paver is set or a single screw is turned, a well-thought-out plan becomes your most powerful tool. It’s what stands between a project that runs over budget and one where every dollar is spent with purpose. This is where your dream takes shape.
Think of it like planning a road trip. You wouldn't just jump in the car and start driving without a map, right? Your blueprint is that map. It guides you from a vague idea to a functional, beautiful reality, helping you steer clear of costly wrong turns.
Setting a Realistic Budget
First things first, let's talk numbers. It's incredibly easy to get swept away by shiny high-end appliances and exotic finishes, but a firm budget is what will keep your project anchored in reality. Start by figuring out the total amount you’re comfortable spending, then start breaking it down.
A smart budget for an outdoor kitchen usually gets divided up something like this:
- Structure & Frame (15-20%): This is the skeleton of your kitchen—the wood or steel frame, cement board, and any foundational masonry work.
- Appliances (30-40%): The grill is the star of the show and will likely be the biggest ticket item in this category.
- Countertops & Finishes (20-25%): This covers all your work surfaces and the materials that give your kitchen its look, like stone veneer or stucco.
- Utilities (10-15%): Set this aside for the professionals you'll need to run gas, electrical, or plumbing lines.
- Contingency (10%): Whatever you do, never skip this. Having a 10% buffer for those inevitable "oops" moments or unexpected costs is non-negotiable.
When you allocate your funds this way, you’re not just guessing. You’re creating a clear spending plan that helps you decide where to splurge and where to save.
Choosing a Cost-Effective Layout
The actual shape of your kitchen has a massive impact on the final price tag. Complex curves and angles mean more materials, more complicated cuts, and more labor. When you're trying to nail down great outdoor kitchen ideas on a budget, simplicity is your secret weapon. The goal is to get maximum function out of a minimal footprint.
For the best bang for your buck, two layouts almost always come out on top:
- Linear or Galley Layout: This is by far the most straightforward and affordable design. By building a single-wall kitchen against your house or a fence, you eliminate tricky corner construction and use far less finishing material.
- L-Shaped Layout: This layout gives you a fantastic workflow without breaking the bank. It naturally creates that classic work triangle between the grill, sink, and prep space without requiring a huge amount of material.
Your layout isn't just about aesthetics; it's a strategic move that directly controls your budget. A simple, efficient design slashes material costs, makes running utilities easier, and often reduces labor hours, putting a premium feel within reach.
These simpler designs are also much more DIY-friendly, making them perfect for a budget-conscious project. If you want to dive deeper into different configurations, our article on building a functional outdoor kitchen island has some great insights.
Embracing Phased Construction
One of the smartest ways to get the kitchen you want without the upfront cost is through phased construction. You’re essentially breaking the project into smaller, more manageable stages. Build what you can afford now, and add the bells and whistles later. It’s the ultimate "grow-as-you-go" strategy.
You can start with just the bare essentials: a solid frame, a quality grill you love, and functional countertops. That alone gives you a fantastic outdoor cooking space you can use right away. Then, as the budget allows, you can build it out.
- Phase 1 (The Core): Get the structure built, install your main grill, and put the countertops on.
- Phase 2 (The Upgrades): Add a sink with basic plumbing, install some built-in storage drawers, or run electrical for task lighting.
- Phase 3 (The Luxuries): This is when you can add an outdoor refrigerator, a side burner for pots and pans, or even a separate pizza oven.
This kind of strategic patience means you never have to compromise on the quality of your core components. You get to build a high-quality foundation from day one, with a clear roadmap to finish your dream kitchen over time—all without going into debt.
Choosing Materials That Deliver a High-End Look
The real secret to an outdoor kitchen that looks and feels luxurious—without the painful price tag—is being clever with your materials. It’s all about finding surfaces and structures that give you that high-end aesthetic and rugged durability for a fraction of the cost. When you get this right, your budget-friendly kitchen starts to look seriously expensive.
It's no surprise that outdoor kitchens are booming. The U.S. market hit USD 9,089.0 million in 2024 and is expected to rocket to USD 18,221.2 million by 2033. While the grill is still king, refrigeration is the fastest-growing part of the market, which tells you people want the full kitchen experience outside. This trend is great news for anyone on a budget, as it reinforces the idea of starting with the essentials and adding more later. You can see the full outdoor kitchen market forecast here.
This all starts with a smart plan that connects your layout, budget, and phasing strategy.
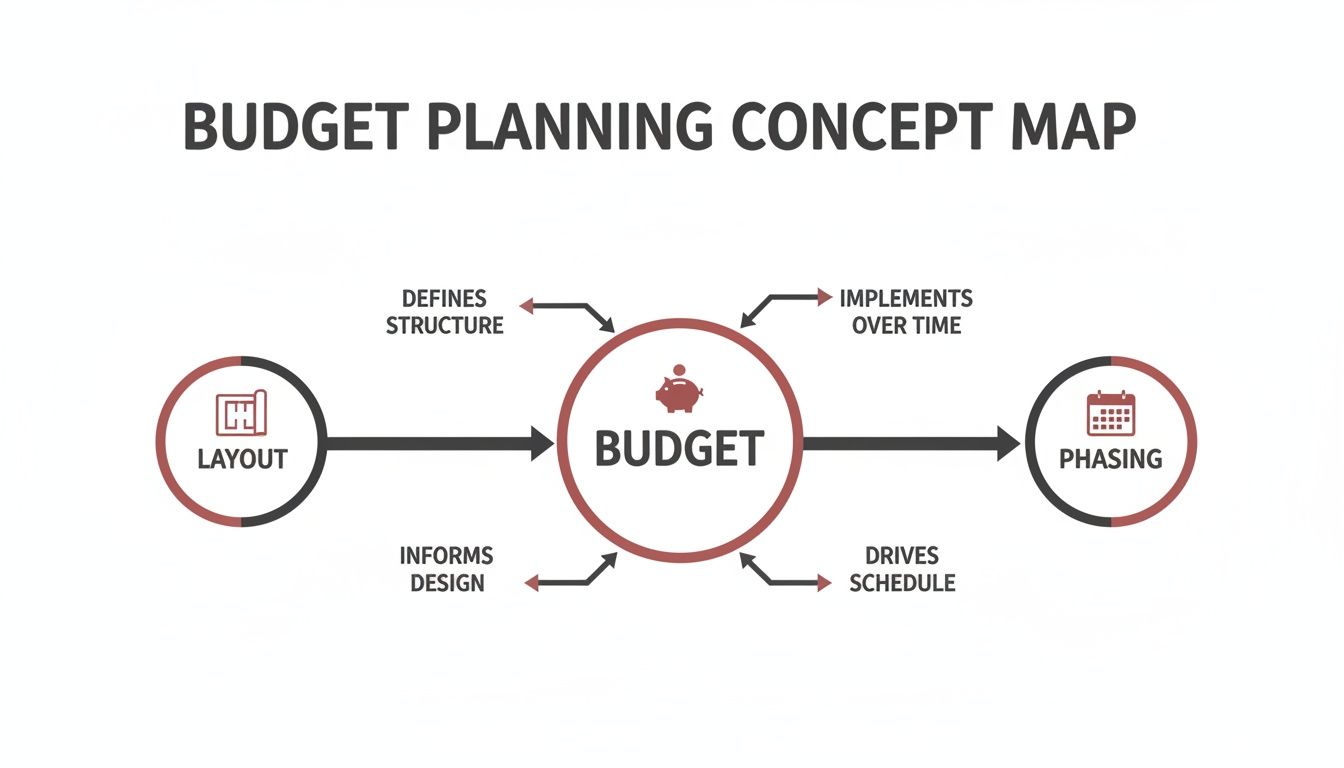
Think of it this way: your budget sets the boundaries for your layout, and your layout helps you decide what to build now and what to save for later.
Countertops That Combine Style and Savings
Your countertops are front and center, but you don't need to blow your budget on granite to get a knockout look. There are plenty of modern alternatives that deliver the same beauty and resilience for much less.
Polished concrete is a fantastic choice for a sleek, industrial-chic vibe. It’s tough as nails, you can customize it with different stains, and it's one of the most affordable routes—especially if you're up for a DIY project. Another great move is using large-format porcelain tiles. These can convincingly mimic expensive natural stone (or even wood), and the minimal grout lines create a clean, seamless surface that’s a breeze to maintain.
By opting for materials like polished concrete or large-format tile over traditional granite or quartz, homeowners can save up to 50-70% on countertop costs without sacrificing the high-end look or durability required for an outdoor setting.
High-End Looks vs Budget-Smart Material Alternatives
Choosing the right materials is the single biggest factor in getting a luxury look for less. Here’s a quick comparison of where to splurge and where to save to get the best of both worlds.
| Kitchen Component | Luxury Material (High Cost) | Smart Alternative (Lower Cost) | Key Benefit |
|---|---|---|---|
| Countertops | Granite, Quartz, Marble | Polished Concrete, Large-Format Porcelain Tile | Durability and style at 50-70% savings. |
| Island Frame | Full Masonry Block | Pressure-Treated Wood or Steel Frame | Hidden structural savings without compromising strength. |
| Island Facade | Full-Bed Natural Stone | Thin Stone Veneer, Stucco, Exterior-Grade Tile | Achieves an identical high-end finish for a fraction of the cost. |
| Flooring | Travertine, Slate | Stained Concrete, Concrete Pavers | Creates a sophisticated, durable foundation on a budget. |
Ultimately, this table shows you how to strategically allocate your funds—investing in aesthetics where it counts while saving on the structural elements nobody sees.
Building a Frame with a Luxurious Facade
Here's a pro tip: the "bones" of your kitchen island are a perfect place to save money that no one will ever see. Instead of a costly full masonry build, the go-to method for savvy homeowners is a framed structure.
You start with a sturdy frame made from pressure-treated wood or steel studs, then wrap it in cement board. This creates a durable, weather-resistant shell that’s ready for whatever finish you want.
And this is where the magic happens. You can cover that cement board base with all sorts of beautiful, affordable finishes:
- Stone Veneer: These are thin slices of real or manufactured stone that give you the authentic look of a solid stone wall for much less money and weight.
- Stucco: A classic for a reason. It's versatile, can be tinted to any color, and textured for a smooth or rustic feel.
- Exterior-Grade Tile: Your options here are endless. You can create modern geometric patterns or go for a timeless subway tile look.
This hybrid approach gives you that custom, built-in look that makes people think you spent a fortune on masonry.
Flooring That Grounds Your Space in Style
Don't forget to look down! The right flooring ties the whole space together, and once again, you don't need to spend a lot to get a premium feel. Stained concrete is a popular choice because it’s incredibly resilient, easy to clean, and can be colored to match your design.
Modern concrete or porcelain pavers are another fantastic option. They come in a huge variety of sizes, shapes, and colors, allowing for sophisticated patterns like herringbone or basketweave. Both choices give you a durable, all-weather surface that elevates your outdoor kitchen's aesthetic while being kind to your wallet. For other outdoor elements that need to withstand the elements, it often pays to invest in quality—for example, it’s worth learning why Grade-A teak is worth the investment for things like furniture.
Investing in Appliances: Where to Splurge and Where to Save
Not all appliances are created equal, and your budget shouldn't treat them that way. When you're working with outdoor kitchen ideas on a budget, the smartest thing you can do is put your money where it matters most—on the gear that will make or break your cooking experience. This is all about being selective, not just cheap.
Think of it like packing for a big camping trip. You'd absolutely invest in a top-notch tent because that's your primary shelter. But you might be okay with a more basic camp stove or lantern. Your grill is that tent.
The Grill: Your Non-Negotiable Splurge
If there’s one place you absolutely cannot skimp, it’s the grill. The grill is the heart and soul of your outdoor kitchen. Trying to save a few hundred dollars here will only lead to frustration, unevenly cooked food, and the hassle of replacing it in just a couple of years. A high-quality grill is a true investment in years of reliable cooking.
So, what does splurging on a grill actually get you?
- Superior Materials: We're talking about high grades of stainless steel (like 304-grade) that stand up to rust and corrosion year after year, unlike their flimsy counterparts.
- Consistent Heat: Better engineering means no more frustrating hot spots. You get even heat distribution and the precise temperature control you need to really nail that steak.
- Durability and Longevity: A well-built grill is designed to live outdoors. It has welded seams and heavy-duty components that won’t quit on you after a few seasons of rain and sun.
Sure, the upfront cost is higher. But a quality grill will perform better and easily last 5-10 years longer than a budget model, which actually makes it the more economical choice in the long run.
Smart Savings on Secondary Appliances
Once you've locked in your top-tier grill, you can get really creative with saving on the supporting cast. This is where you can find budget-friendly alternatives that get the job done without compromising the core function of your kitchen. It’s a great chance to be resourceful.
A big part of what makes this possible is the boom in online shopping. The market for direct-to-consumer outdoor kitchen parts is expected to grow by a massive 9.9% CAGR between 2025 and 2030. This means you have direct access to better prices and a huge selection, making it easier than ever to find what you need without breaking the bank. You can discover more insights about outdoor kitchen trends to see where the market is headed.
Here are a few of the smartest swaps you can make:
The Cooler-as-Fridge Strategy: Instead of dropping $1,000+ on an outdoor-rated refrigerator, start with a high-quality, well-insulated cooler. A premium rotomolded cooler can keep ice for days and does the exact same job for a tiny fraction of the cost, freeing up a significant chunk of your budget.
This simple trick lets you have cold drinks on hand from day one, and you can always add that built-in fridge later when the budget allows for it.
Cost-Effective Alternatives to Built-In Extras
Don't feel pressured to install every single built-in appliance right out of the gate. Many of the most common "extras" have fantastic, low-cost portable replacements that give you even more flexibility.
Instead of a Built-In Side Burner, Try a Portable Induction Cooktop. A built-in gas side burner can easily add $400 to $800 to your project. For less than $100, you can get a great portable induction cooktop that heats pans incredibly fast, is safer to use, and can be tucked away when you need the counter space.
Skip the Warming Drawer for Now. Unless you’re hosting huge parties every weekend, a warming drawer is a luxury you can probably live without. For smaller get-togethers, you can keep food warm in your indoor oven or just use a simple insulated food carrier.
By focusing your investment on an amazing grill and using clever stand-ins for everything else, you can build a seriously capable kitchen without the sky-high price. When you're ready to expand, you can always explore our complete guide on choosing the best outdoor kitchen appliances to plan your next upgrade.
Deciding Between DIY and Hiring a Professional
One of the biggest decisions you'll make—and one that has a huge impact on your budget—is who will actually build your outdoor kitchen. Are you going all-in on a DIY project, hiring a contractor to handle everything, or finding a middle ground? The right answer really comes down to your own skills, how much time you have, and what you’re comfortable tackling.
Plenty of homeowners have saved thousands of dollars by rolling up their sleeves and doing the work themselves. If you know your way around basic construction, a good portion of an outdoor kitchen project is well within reach for a motivated DIYer.
Tasks Perfect for a Confident DIYer
Taking on the right jobs yourself is the single fastest way to cut costs. Think about it: labor can easily eat up 40-60% of a professionally installed kitchen's price tag. By putting in some sweat equity, you can redirect that money toward a better grill or nicer countertops.
Here are a few areas where you can make a real dent in the budget:
- Building the Frame: Putting together the island's skeleton, whether from steel studs or pressure-treated wood, is a very manageable job for anyone who's comfortable with a saw and a drill. This is the starting point for most budget-friendly builds.
- Assembling Modular Cabinets: If you go with a pre-made cabinet system, putting it all together is often just a matter of following the instructions and screwing the pieces together.
- Installing Cladding and Veneer: This is more about patience than raw skill. Applying stone veneer, tile, or a stucco finish to the island base is a detail-oriented job that can save you a bundle.
- Laying Pavers: Building a simple paver patio as the foundation for your kitchen is hard work, no doubt, but it's straightforward. This can save you a significant amount on what a hardscaping company would charge.
When to Absolutely Hire a Professional
While doing it yourself is great for saving money, some jobs are simply non-negotiable. You never want to cut corners when it comes to safety. Mistakes with gas or electrical lines can be incredibly dangerous and catastrophically expensive to fix later on.
Don't even think about touching gas lines or complex electrical wiring yourself. The risk of leaks, fire, or electrocution is just too high. A professional's fee is a small price to pay for the safety of your home and family.
Make sure you have a licensed and insured pro lined up for these tasks:
- Running Gas Lines: A licensed plumber or gas fitter is the only person who should be connecting your grill to a natural gas or propane line. They'll ensure every connection is tight, leak-free, and up to code.
- Complex Electrical Work: An electrician needs to handle installing GFCI outlets, running wiring for lights, or hooking up an outdoor fridge. This ensures everything is safely grounded and protected from the elements.
- Plumbing for Sinks and Drains: Tying a sink into your home's water supply and setting up the drainage is a job for a plumber. Get it wrong, and you could be looking at leaks, water damage, and a massive headache.
The Hybrid Approach: The Best of Both Worlds
For most people trying to stick to a budget, the hybrid approach is the sweet spot. It offers the perfect balance: you take on the manual labor you're comfortable with and bring in the pros for the technical, high-stakes jobs.
This strategy lets you slash those big labor costs while still ensuring the critical systems are installed safely and correctly. For example, you might build the entire island structure and finish the exterior yourself, then have an electrician and plumber come in for just a few hours to make the final connections. You can find components for these builds, like special block vents that are perfect for DIY outdoor kitchen projects that need proper ventilation. It's a smart compromise that delivers the most bang for your buck without cutting any corners on safety.
Three Budget-Friendly Kitchens You Can Build Now
It’s one thing to talk about budgets and materials in theory, but the fun really starts when you can see how it all comes together. To help you bridge that gap from idea to reality, I've mapped out three distinct, real-world examples of what you can build on a smart budget.
Think of these less as rigid blueprints and more as proven starting points. They show how different layouts, appliances, and materials combine at various price points. Each one is designed to deliver maximum style and function without breaking the bank. Let's dig in.

The Compact Patio Grilling Station
This is the perfect entry point into the world of outdoor kitchens. It’s living proof that you don't need a sprawling backyard to create a seriously useful cooking space. This design is tailor-made for smaller patios, townhome courtyards, or for anyone who just wants a dedicated grilling spot without a major construction overhaul.
- Target Budget: Under $2,500
- Layout: A simple linear setup, about 6-8 feet long.
-
Key Components:
- Grill: Start with a high-quality freestanding gas or charcoal grill you love. This move alone saves you the cost of a built-in unit and the complicated framing that goes with it.
- Structure: A sturdy frame built from pressure-treated lumber is a classic DIY-friendly choice.
- Countertops: Poured-in-place concrete is a game-changer. It’s a fantastic DIY project that gives you an incredibly durable, high-end modern look for a fraction of the cost of other materials.
- Finish: Keep it clean and simple with stucco or an exterior-grade paint over cement board.
This minimalist approach focuses on what really counts: a great grill and enough counter space to actually prep your food. By designing around a freestanding grill and using DIY-friendly materials, you get a custom look while slashing labor and appliance costs.
The Family Entertainment Hub
When you want a bit more room to host and have your kitchen feel like the heart of the party, this L-shaped design is a fantastic option. The layout naturally creates a social hub with distinct zones for cooking, prepping, and serving drinks. It’s absolutely ideal for those weekend family barbecues and casual get-togethers with friends.
- Target Budget: Under $5,000
- Layout: An efficient L-Shape (think one 8-foot leg and one 5-foot leg).
-
Key Components:
- Grill: Step up to an affordable, mid-range built-in gas grill for that seamless look.
- Structure: A steel stud frame is the way to go here. It’s incredibly rigid and stands up to weather beautifully.
- Countertops: Large-format porcelain tiles give you the gorgeous look of natural stone without the hefty price tag or the back-breaking weight.
- Finish: Faux stone veneer on the base is a brilliant trick. It gives the kitchen a substantial, high-end masonry look for a fraction of what real stonework would cost.
- Storage: Plan for cutouts to add simple stainless steel access doors—perfect for hiding the propane tank and all your grilling tools.
The Aspiring Outdoor Chef
This is for the serious home cook, the one who dreams of having a full outdoor cooking arsenal. The secret here is using pre-fabricated modules to make construction faster and easier, while still planning ahead for future upgrades you know you'll want later, like a pizza oven or a dedicated side burner.
- Target Budget: Under $8,000
- Layout: A U-Shape or a more expansive L-Shape that includes a bar-height counter for seating.
-
Key Components:
- Structure: Pre-fabricated galvanized steel modules are a huge time-saver. These panels bolt together quickly, guaranteeing a perfectly square and level base without all the guesswork.
- Grill: Invest in a premium built-in grill with the bells and whistles you'll actually use, like an infrared rotisserie burner.
- Countertops: Granite or quartz tile delivers that luxurious feel at a much lower cost than going with a full slab.
- Features: This is all about planning. Frame out a dedicated spot for that future pizza oven and include a cutout for an outdoor refrigerator. For now, you can just cover the openings with matching access doors until you're ready to buy the appliances.
Answering Your Top Questions About Building an Outdoor Kitchen on a Budget
When you're diving into your first outdoor kitchen project, it’s natural for a ton of questions to pop up. Getting good, honest answers is the best way to feel confident and keep your build moving in the right direction. Let's tackle some of the most common things homeowners ask when planning their dream outdoor kitchen on a budget.
What’s the Cheapest Way to Build the Base Structure?
Hands down, the most affordable and popular route is building a frame from pressure-treated wood. It’s a solid, reliable foundation. Once the frame is up, you cover it with cement board, which gives you a tough, weather-proof shell that’s ready for whatever finish you choose.
This method gives you all the structural support you need without the hefty price tag of a full masonry or steel frame build. From there, you can get that custom, high-end look with budget-friendly finishes like stucco, exterior-grade tile, or even a thin stone veneer.
Can I Just Put My Indoor Mini-Fridge Outside?
I get this question all the time, and the answer is a hard no. It might seem like an easy way to save a few hundred bucks, but an indoor fridge just isn't built for the great outdoors. It can't handle the humidity, rain, and wild temperature swings.
Best case scenario? It works really hard, your energy bill spikes, and it dies an early death. Worst case? It becomes a serious safety hazard.
Pro Tip: A fantastic budget-friendly alternative is a high-quality, rotomolded cooler. A good one can keep ice for days and does the job perfectly until you're ready to upgrade to a proper UL-rated outdoor refrigerator.
What’s a Realistic Budget for a Simple Outdoor Kitchen?
If you’re smart about it and willing to do some of the work yourself, you can build a fantastic, functional, and stylish outdoor kitchen for somewhere between $2,500 and $5,000.
That budget usually covers a sturdy frame, a quality built-in grill, a good amount of counter space (think concrete or tile), and some basic cabinet doors for storage. The final number really comes down to the appliances and materials you choose and how much of the project you DIY.
At URBANMANCAVES, we're all about providing the heirloom-quality components and expert advice you need to build the outdoor kitchen of your dreams, no matter what your budget looks like. Come explore our hand-picked collections of grills, DIY components, and more at https://www.urbanmancaves.com.